
The Arc Flash Study Process, Step by Step
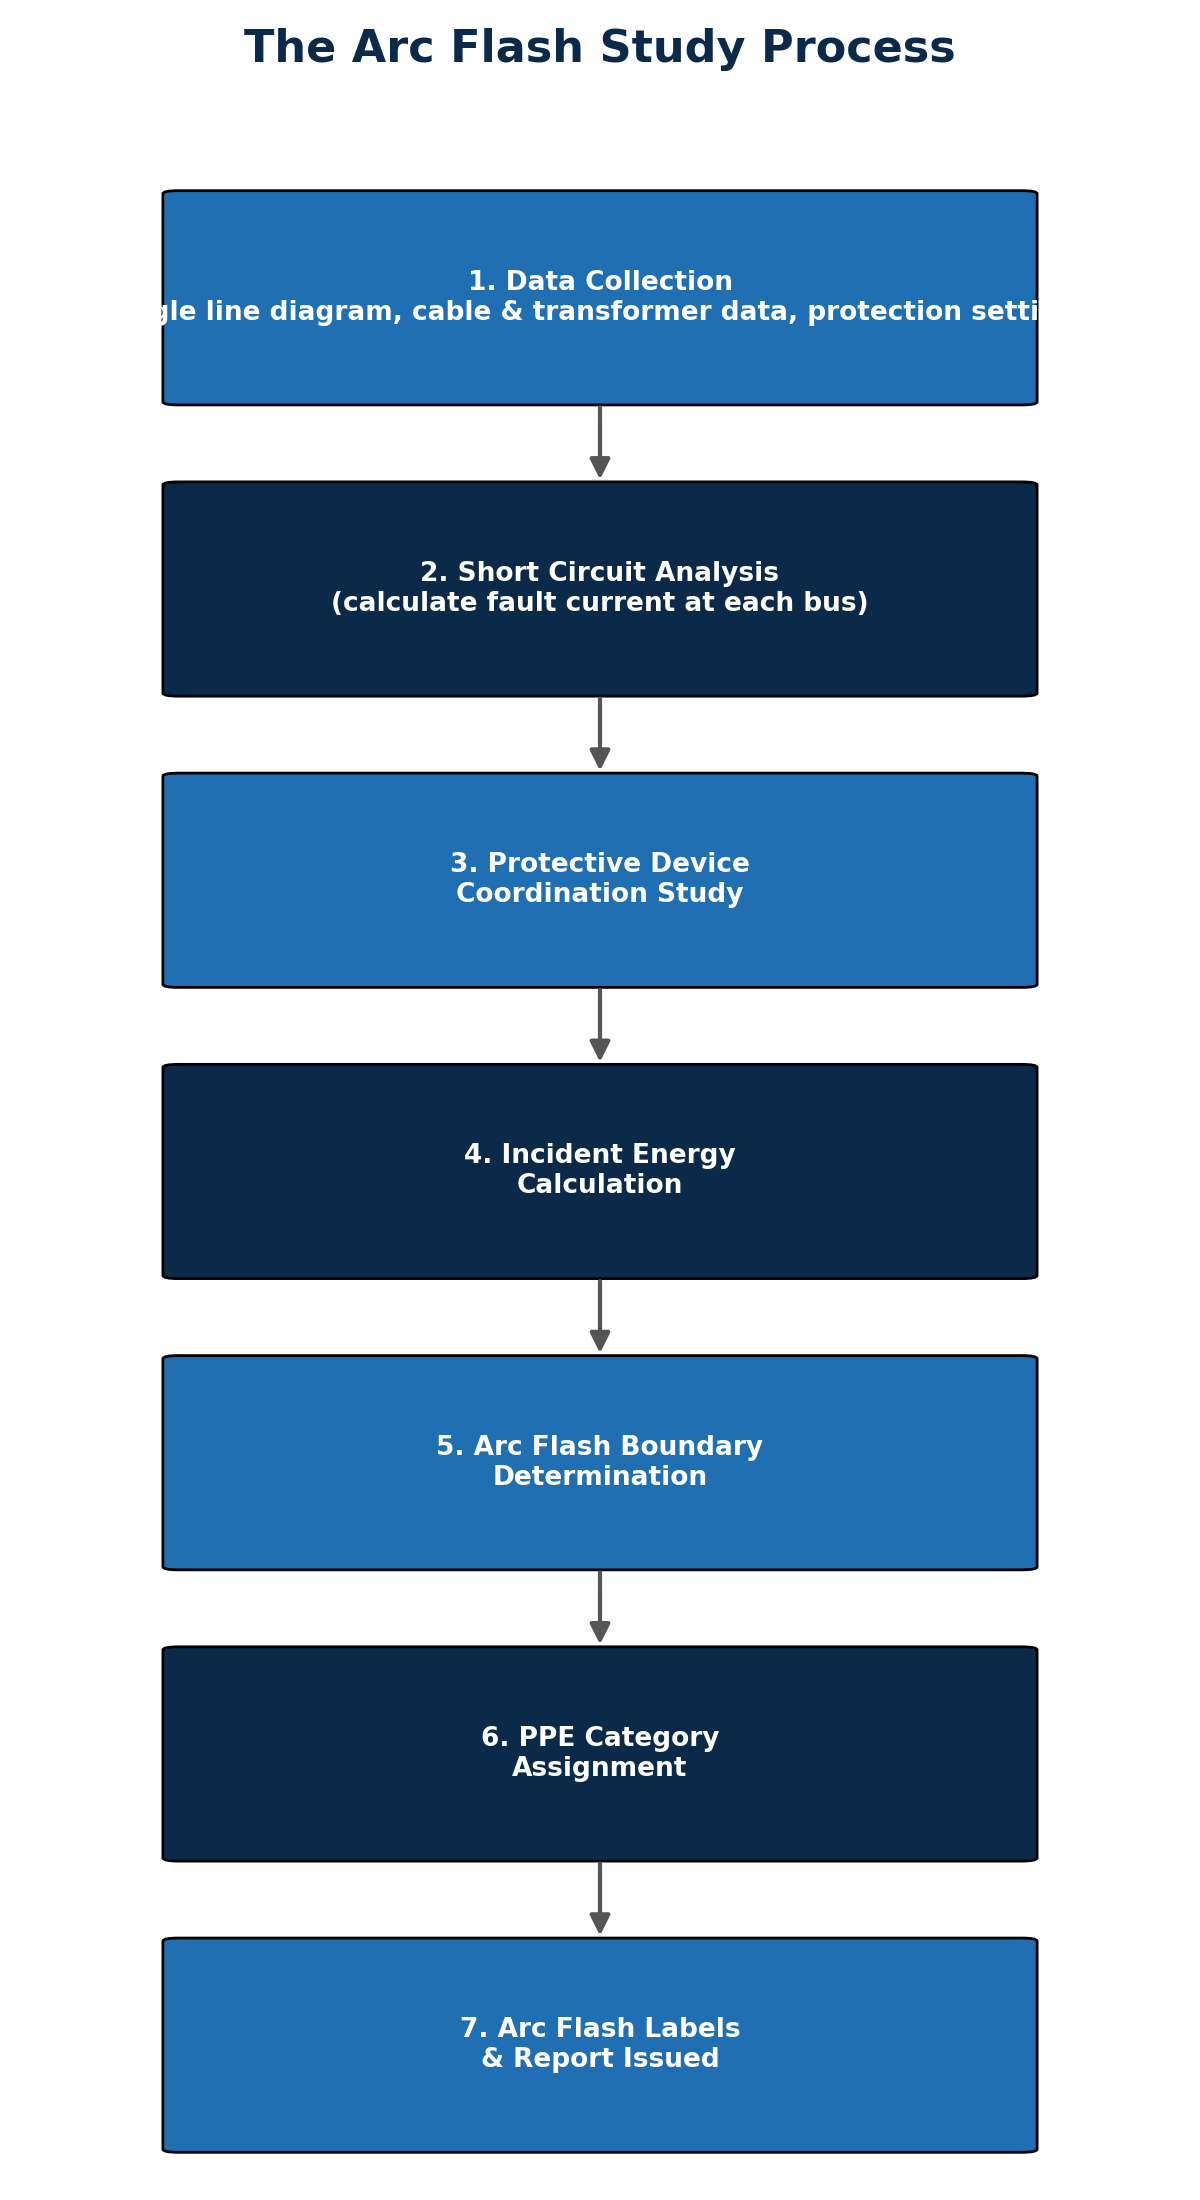
Step 1: Data Collection
The study starts with gathering accurate data on the electrical network: single line diagrams, transformer ratings and impedances, cable lengths and sizes, protective device types and settings, and utility fault level data. The accuracy of every later step depends entirely on how good this data is — this is usually the most time-consuming part of the process, and often involves a site visit to verify what's actually installed against existing drawings, since as-built conditions frequently differ from what's on record.
Step 2: Short Circuit Analysis
Using the collected data, we model the network to calculate the available fault current at every bus (switchboard, distribution board, or panel) in the system. This determines how much energy is available to feed an arc fault at each location.
Step 3: Protective Device Coordination Study
This step reviews how quickly each protective device — fuse, circuit breaker, or relay — will clear a fault at that point in the network, and checks that devices are correctly coordinated (so the closest device trips first, minimising the affected area). Poor coordination doesn't just cause nuisance outages — it directly increases arc flash energy, because a fault takes longer to clear.
Step 4: Incident Energy Calculation
Combining the fault current and clearing time, we calculate the incident energy — the thermal energy that would be released at a defined working distance if an arc fault occurred at that location. This is expressed in cal/cm² and is the core number the rest of the study is built around.
Step 5: Arc Flash Boundary Determination
From the incident energy figure, we calculate the arc flash boundary — the distance at which a person without arc-rated PPE would receive a second-degree burn. Anyone working inside that boundary needs to wear PPE rated to the calculated incident energy.
Step 6: PPE Category Assignment
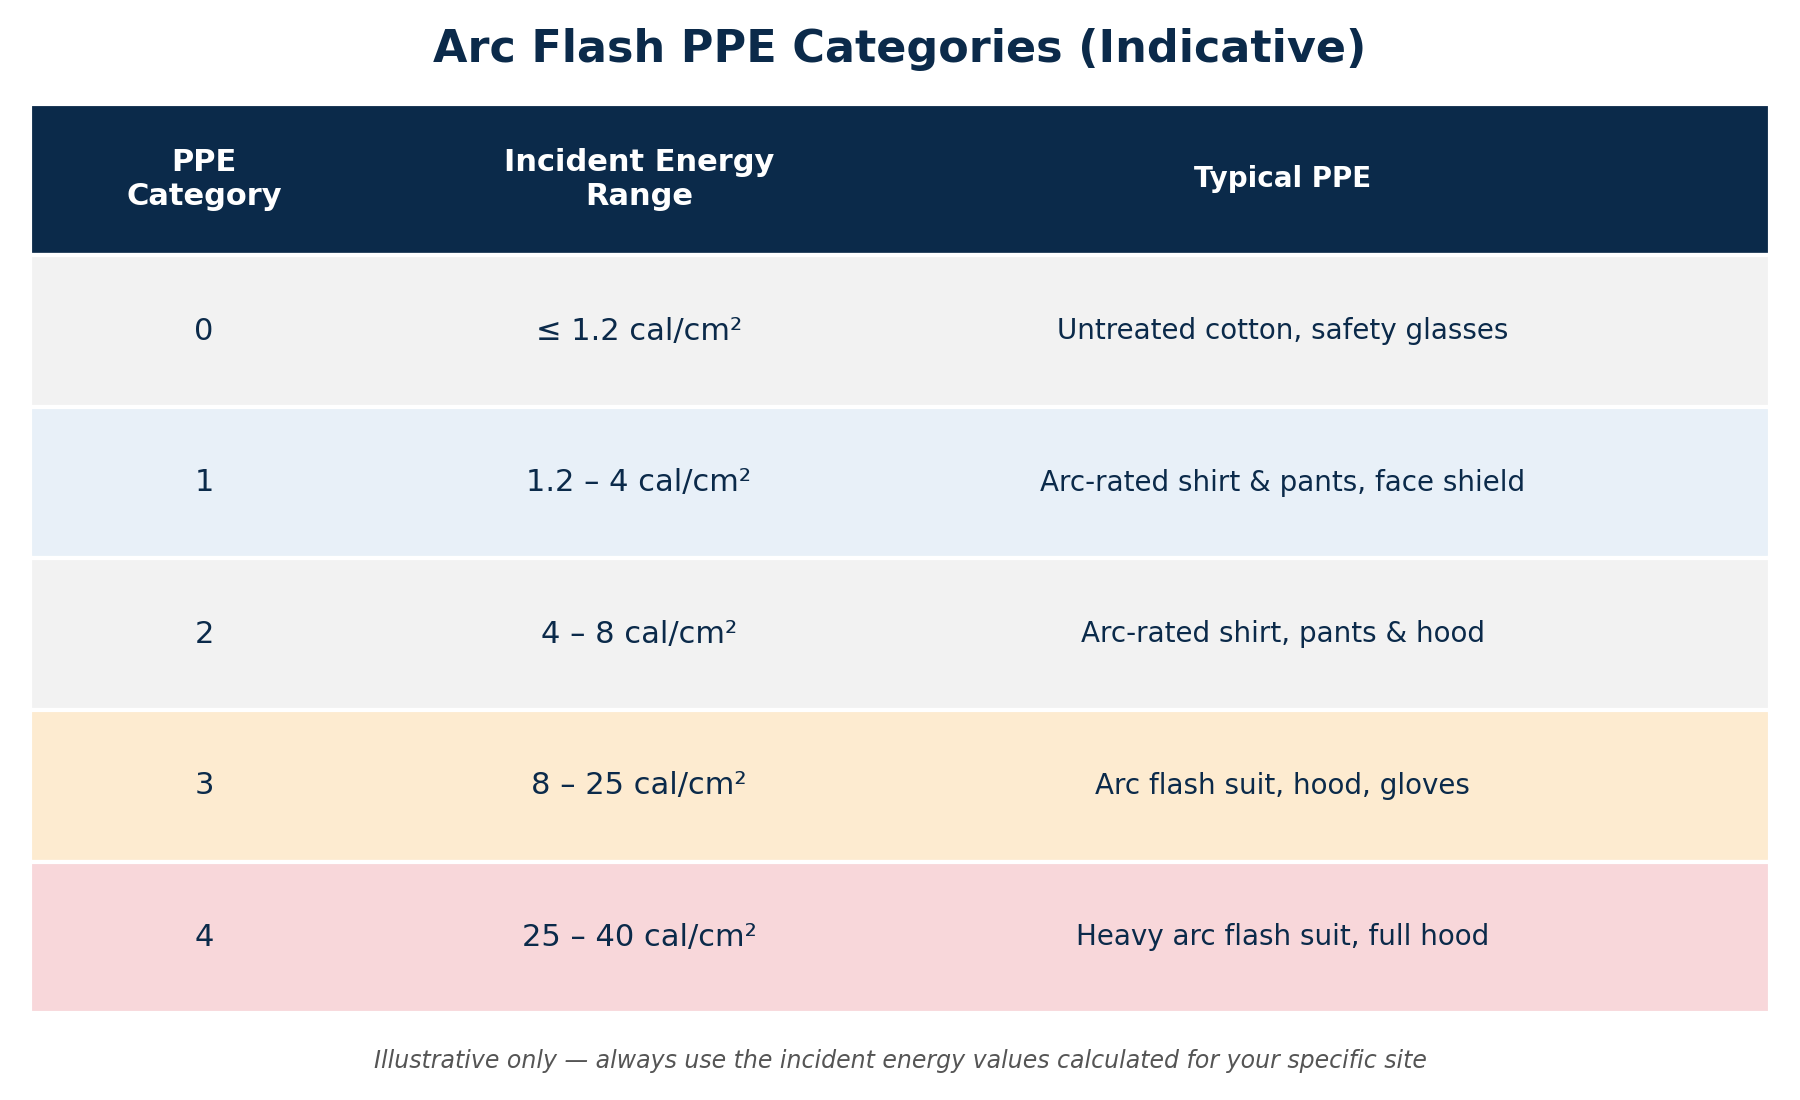
Based on the incident energy at each piece of equipment, an appropriate PPE category is assigned, which translates directly into what clothing and equipment a worker needs to wear before opening a panel.
Step 7: Arc Flash Labels and Report
The final step is producing arc flash warning labels for each switchboard or panel — showing incident energy, arc flash boundary, required PPE category, and equipment details — along with a complete engineering report documenting the methodology, assumptions, and results for every point studied. Labels get fitted directly to the equipment; the report is retained as the supporting record.
What You Get at the End
Arc flash warning labels fitted to your switchboards and panels
A full engineering report with calculations, assumptions, and results for every location studied
Clear PPE requirements for anyone working on or near the equipment
Recommendations for any protection setting changes that would reduce incident energy, where relevant
When Should You Get an Arc Flash Study Done?
If your building has never had one, hasn't had one since a switchboard upgrade, or protection settings have changed since the last study, it's worth getting an up-to-date assessment. As a rough guide, studies should be reviewed whenever the electrical system changes materially, and periodically even without changes, since utility fault levels can shift over time.
Get an Arc Flash Study Done